
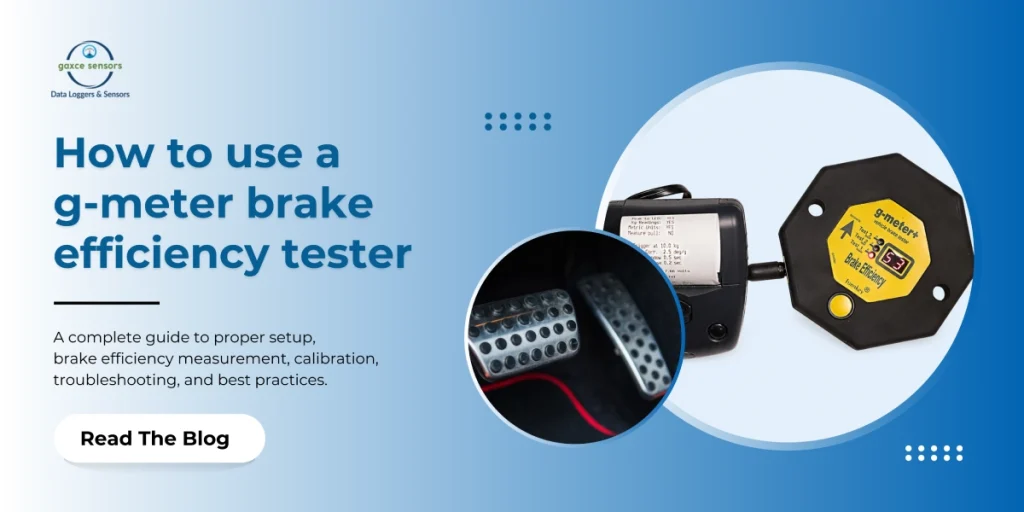
Quick Answer: How to Use a G-Meter for Brake Efficiency Testing
- Switch on — press the button; wait for self-check to finish.
- Check warnings — confirm no Lo (low battery) or cd (calibration due) is flashing.
- Mount the device — flat, stable, facing roughly forward (±60° tolerance).
- Arm it — press and hold, release at oo, wait for go.
- Drive at ~20 mph (32 kph) on a level road.
- Apply the brake being tested (service brake, then parking brake separately).
- Read the result — peak/mean deceleration in % g or metres/sec².
- Switch off — double-click the button, or it auto-offs after 4 minutes.
Brake performance is one of the most safety-critical checks in any vehicle inspection. For vehicles that can’t be tested on a roller brake efficiency tester — certain trailers, HGVs, vintage vehicles, or vehicles with unusual axle configurations — a g-meter (decelerometer) is the go-to tool for statutory MOT brake efficiency testing. This guide walks through exactly how to use a g-meter, the official test procedure, common mistakes to avoid, and answers to the questions testers ask most.
What Is a G-Meter Tester?
A g-meter is a portable electronic decelerometer used for statutory MOT brake efficiency performance testing of Class I–VII vehicles and Heavy Goods Vehicles. It measures how quickly a vehicle slows down during braking and displays the result as either:
- Brake efficiency (%) — shown as a whole number with no decimal point
- Deceleration (metres per second per second) — shown with a decimal point
Modern g-meters use a multi-axis electronic sensor rather than an old-fashioned mechanical pendulum. That gives testers several practical advantages:
- Self-aligning
automatically senses the direction of travel, so precise placement isn’t critical
- Built-in memory
stores the results of the last test, even after power-off
- Internal clock
timestamps every test automatically
- Peak and mean deceleration readings
both are captured for a complete picture
- Automatic warnings
flags a low battery or an overdue calibration before you can misuse the device
- UKAS-traceable calibration
ensures results are legally defensible
Key Specifications to Know Before You Start
| Feature | Detail |
|---|---|
| Measurement range | 0 to 2.0 g |
| Accuracy | Better than ±3% g |
| Display | 2-digit, 7-segment LED, readable in sunlight |
| Start window | 0.5 seconds |
| Brake threshold | 10% g |
| Tilt compensation | 2.5 degrees per g |
| Battery | 9V PP3 alkaline (or CR2032 lithium backup) |
| Battery life | ~20 hours (PP3) |
| Memory | 1 test result |
| Interface | RS232C via 4-pole 2.5mm jack |
Understanding these specs matters because they explain why the device behaves the way it does — for example, why it needs a 0.5-second window to start recording, or why it won’t register a “test” until deceleration crosses the 10% g threshold.
Step-by-Step: How to Use a G-Meter for Brake Efficiency Testing
The 8 steps above cover the summary — here’s the full detail behind each one.
Step 1: Switch the Device On
Press and release the large yellow button. The display shows — briefly while the g-meter performs a self-check and recovers its last settings from memory. If E1, E2, or E3 flashes, stop and contact the manufacturer — do not proceed with a test.
Step 2: Check the Battery and Calibration Status
- If the display flashes Lo, the battery is exhausted. Replace it with a 9V PP3 alkaline battery immediately.
- If the display flashes cd, calibration is overdue.
Do not carry out statutory testing if either warning is showing. Using an out-of-calibration or low-battery device invalidates the test and risks an unsafe pass/fail decision.
Step 3: Position the G-Meter in the Vehicle
- Place the device on a flat, stable surface inside the vehicle, as parallel to the road surface as possible.
- Point the direction-of-travel arrow roughly forward — it doesn’t need to be exact. Because the sensor is self-aligning, an error of up to ±60 degrees from true direction of travel won’t meaningfully affect the reading.
- Make sure the g-meter is secured so it cannot slide or move under hard braking.
Step 4: Arm the Device for a New Test
Press and hold the button. The previous stored result is only overwritten once a new test is completed, so you won’t lose data by arming and then cancelling.
- Release the button when oo appears on the display.
- After a short pause, the g-meter calculates its tilt within the vehicle and finishes arming.
- Wait for go to appear — this means the device is ready.
Do not move the vehicle or disturb the g-meter until go is displayed. If you need to cancel, press the button again; the previous test result is retained.
Step 5: Drive and Brake
Following the procedure in the current MOT Inspection Manual:
- Drive the vehicle on a level, good-surfaced road with light traffic at a steady speed of approximately 20 mph (32 kph).
- Apply the service brake only, and note the recorded efficiency.
- Apply the parking brake only, and note the recorded efficiency.
- While decelerating under the service brake, watch for any pull on the steering wheel or swerve.
During the test, the display shows:
- Ac while the vehicle is accelerating
- St while the vehicle is stopping/decelerating
The g-meter automatically detects the start and end of deceleration — you don’t need to press anything mid-test.
Step 6: Read and Record the Result
Once the test completes, the g-meter retains the peak and mean deceleration figures in memory. You can toggle the display between:
- Peak or mean deceleration
- % g or metres/sec²
Record the figures against the vehicle’s required Brake Efficiency Table values.
Step 7: Switch Off
The g-meter automatically powers off if the button isn’t pressed for 4 minutes (it will not auto-off while armed for a test). To switch off manually, double-click the button.
Roads Suitable for Decelerometer Testing
Not every road is appropriate for a decelerometer brake efficiency test. The test road should:
- Have a good, consistent surface
- Be suitable for testing whether wet or dry
- Carry minimal traffic
- Not be used so repeatedly that it generates complaints from local residents
Testing Transmission Handbrakes
When testing a transmission-type handbrake with a decelerometer, keep the ratchet disengaged for as long as the brake is applied, and take the efficiency reading before any transmission snatch or judder occurs. Snatch/judder can produce a falsely high or erratic reading.
Best Practices for Accurate G-Meter Testing
- Always check battery and calibration status before every test — these two warnings exist specifically to stop invalid statutory tests.
- Secure the device properly. Even though the sensor is self-aligning, a g-meter that slides or tips during braking will produce unreliable results.
- Wait for go before moving off. Testing before the device finishes arming and calculating tilt compensation will invalidate the reading.
- Use a consistent, appropriate test road — surface quality and traffic conditions materially affect repeatability.
- Advise the vehicle presenter on marginal passes. If a vehicle’s brake efficiency just scrapes past the minimum, but that vehicle type typically performs much better, testers should still advise the presenter that the braking system likely needs adjustment — even though the vehicle technically passed.
- Don’t rely on memory across multiple tests. The g-meter only stores one test result at a time, and it’s overwritten when a new test is completed — record your figures before arming the next test.
Common Mistakes to Avoid
| Mistake | Why It’s a Problem |
|---|---|
| Testing with the Lo battery warning flashing | Statutory results become invalid; battery-related sensor drift is a real risk |
| Testing with the cd calibration warning flashing | Calibration is a legal requirement for statutory MOT testing — results won’t hold up |
| Moving off before go appears | The device hasn’t finished tilt compensation, so accuracy is compromised |
| Mounting the g-meter loosely or on an angled surface | Movement or excessive tilt during braking skews peak/mean readings |
| Ignoring steering pull or swerve during the service brake efficiency test | This is a specific rejection criterion in the MOT Inspection Manual, independent of the numeric efficiency reading |
| Testing transmission handbrakes through snatch/judder | Produces an inaccurate efficiency figure |
| Overusing the same public road for repeat testing | Can generate resident complaints and isn’t in line with recommended practice |
Reasons a Vehicle Fails a Decelerometer Brake Efficiency Test
According to the MOT Inspection Manual method of inspection, a vehicle should be rejected if:
- The service brake efficiency recorded doesn’t meet the Brake Efficiency Table requirements
- The parking brake efficiency recorded doesn’t meet the Brake Efficiency Table requirements
- During service brake application, there is severe grab or judder, severe pull to one side on the steering wheel, and/or the vehicle swerves appreciably
Frequently Asked Questions (FAQs)
What is a g-meter used for? A g-meter (decelerometer) is used for statutory MOT brake performance testing of vehicles that can’t be tested on a roller brake efficiency tester, measuring brake efficiency efficiency as a percentage or deceleration in metres per second squared.
What speed should I drive at for a decelerometer brake efficiency test? The MOT Inspection Manual specifies driving at a steady speed of approximately 20 mph (32 kph) on a level road before applying the brake being tested.
How accurate is a g-meter? A typical g-meter offers accuracy better than ±3% g, with 1% g resolution on the LED display, and uses UKAS-traceable multipoint calibration.
Can I use a g-meter if the calibration is overdue? No. If the display flashes cd, calibration is due and the instrument must not be used for statutory testing until it’s recalibrated.
What does it mean if the g-meter shows Lo? Lo means the battery is exhausted and needs replacing with a 9V PP3 alkaline battery. Do not use the device for statutory testing while this warning is flashing.
Does the g-meter need to point exactly in the direction of travel? No. Because the sensor is self-aligning, as long as the direction-of-travel arrow is within roughly ±60 degrees of the actual direction of travel, no significant error is introduced.
How many test results can a g-meter store? Most g-meters store only one set of test results at a time. This is retained even if the instrument is switched off, but it’s overwritten once a new test is completed.
What’s the difference between peak and mean deceleration? Peak deceleration is the highest instantaneous g-force recorded during braking; mean deceleration is the average across the whole stop. A g-meter can display either, in % g or metres/sec².
How often does a g-meter need calibrating? At least every 24 months, by the manufacturer or another UKAS-approved organisation.
What should I do if a vehicle just barely passes the brake efficiency requirement? Even though the vehicle has technically passed, if you know that vehicle type normally achieves a higher performance figure, you should advise the presenter that the braking system appears to need adjustment.
This guide summarizes standard operating procedure for MOT decelerometer brake efficiency testing. Always refer to the latest edition of the official MOT Inspection Manual and the specific g-meter manufacturer’s instructions before carrying out statutory testing.